Posted by android team
Rabu, 02 Desember 2015
0 comments
In order to help the users of Ultra to know how to flash this phone, Our technology engineer has demonstrated the whole flash process for you in this tutorial video. Hope it can do some help to you.
Caution: Please do not update firmware unless you know what you are doing, you really want it or it is absolutely necessary. Firmware updates may occasionally have bad results, like bricking your device, temporarily or permanently. The firmware update process is done entirely at your own risk. Before attempting to update the firmware, back up your data.
Don’t miss any of our future video tutorials, follow us on Youtube. Like us on Facebook. Add us in your circles on Google+. Watch our photo albums on Flickr. Subscribe now to our newsletter.
Posted by android team
Minggu, 15 November 2015
0 comments
This is a simple tutorial on how to flash latest stock firmware on No.1 S3 smartwatch. Make sure to backup or write down the IMEI number (*#06#), after the upgrade you must rewrite IMEI number so that you can make direct calls from the watch.
1. First, you'll have to download the latest stock firmware archive 20150922 from here.
2. Install driver for the smart watch. Extract the archive and search 'drive' folder, run 'InstallDriver.exe' as Admin and install the drivers. I have Windows 10 Pro x64 and it worked with no problem at all.
3. Open “2502 firmware update tool” folder, double click “Flash_Tool.exe", Check “Scatter/Config File”,then choose firmware update file, then check “Download”. After check “download”, connect S3 with computer, but make sure S3 is power off. During burning time, the data will keep updating, it is normal, don’t worry. (red line, yellow line, blue line and finally the green line). When green color line is displayed it means that the flashing was successful.
Welcome to the definitive guide about Root and Jailbreak of Xiaomi Mi Box
What you need 1, Xiaomi Mi Box 3rd Generation (with firmware equal or greater than v1.3.50 - tested with v1.3.73) 2, A Pc (or VirtualMachine) running Windows 7/8/8.1 3, HDMI cable 4, USB to microUSB cable 5, USB Mouse (Wireless Mouse doesn't work) 6, TV/Monitor near the PC (with HDMI-in) 7, USB PenDrive (FAT32) 8, MicroSD (FAT32) 9. Download miboxproroot_ROM_GreaterThan_1.3.50 archive from here, here or here.
First of all connect the Mi Box to power and to TV/Monitor with HDMI cable.Wait for the Mi Box to start, and then you will see the main page.As you can see the UI will be in Chinese and you can't set English language until you will Root the Mi Box.
Follow the pictures guide below 1. Using the remote, go to "Settings" and press Enter 2. Let's move, with the remote, on the icon you can see here 3. Now you got these two options. First option let you to install Apps from unknown sources; Second option refer to ADB; 4. You need to change them to "允许" (allow) 5. Now let's setup the PC/VirtualMachine: Download and Install Android Studio http://developer.android.com/sdk/index.html Download and unzip on Desktop "miboxproroot_ROM_GreaterThan_1.3.50.zip" Download and run "RootGenius_en.exe" (you will just use this to let Windows to install ADB Driver for Mi Box) Connect the MiBox to PC/VirtualMachine with the USB to microUSB cable Click on 'Next' and wait for RootGenius to automatically download and install the driver Now you can quit RootGenius 6. Now insert the microSD in the PC and format it in FAT32; then insert it in the Mi Box. 7. Now go to "miboxproroot_ROM_GreaterThan_1.3.50" folder and double-click on "mibox3GEN_root_en.bat". You will see a Command Prompt window: ** You need to do these steps with Mi Box connected to TV: you have to use the remote to allow script to run as soon as you will see the popup on Mi Box UI ** 8. Press Enter in the Command Prompt window 9. Now move your eyes to TV and allow the script to run with the remote by press on "允许" (allow) 10. At this time the script will Root the Mi Box. Once it will finish the Mi Box will automatically reboot itself and then you will be able to see 'Super SU' icon on Home page 11. Remove both USB cable and microSD. Now let's install Apex Launcher (that you will use to switch from Chinese to English): 12. Connect a PenDrive to the PC (and format it in FAT32), then copy "com.anddoes.launcher.apk" on it 13. Remove the PenDrive from the PC and connect it to USB port on Mi Box 14. Mi Box will notify you about a removable storage: with remote go to USB icon on the upper side of Mi Box UI 15. Go to PenDrive and open "com.anddoes.launcher.apk" 16. Let’s install APK allowing ROOT permission 17. Once the installation is done back to Home screen and let's start Apex Launcher: 18. Go to Settings: 19. With remote go to this option: 20. Press enter on this: 21. Select 'English' 22. Go back to Home screen with remote and you will see the English UI.
Posted by android team
Selasa, 13 Oktober 2015
0 comments
Instructions
1. Download the latest stock firmware from here and extract the archive on your desktop.
2. Second, be ready to connect Rikomagic MK68 TV Box to your computer. Prepare an USB cable (male USB to male USB cable); insert one USB to computer USB port. Prepare also a thin metal stick; press the reset button from the bottom side, like in the video below. Don’t loose the stick, at same time, insert the second USB to the unit USB OTG port, in the rear side. After 3-5 seconds, loose the stick.
This process will take about 4 minutes, please wait patiently, during recovery/upgrade, don’t remove the USB cable and don’t power off during updating or recovering. First reboot of the unit after recovery/update will take more long time than usual, and even occur some lag issue, it’s normal since internal apk files need to be decompressed and occupy RAM, after 5 minutes, then system will be running well. So don’t worry about that.
We were pioneers of the Android Mini PC concept and were the first Android Mini PC provider. Based in Shenzhen, China, Rikomagic aims to revolutionize the digital media player market. Our Research and Development team has extensive expertise in consumer electronics products and the development of network media players. Our core strength remains focussed around Android PCs and Android Mini PCs, where we have a great deal of experience. Rikomagic has been at the forefront of the development of multimedia, internet connected devices which truly transform TVs into home entertainment centers. The combination of our forward-looking market research, proven technological expertise and acumen, innovation, and our mature and efficient development process has given us industry-wide recognition. We differentiate ourselves by the quality, value and sophistication of our products. Our customers trust the RKM brand to enhance their entertainment experience, and we always strive to exceed their expectations.
Don’t miss any of our future video tutorials, follow us on Youtube. Like us on Facebook. Add us in your circles on Google+. Watch our photo albums on Flickr. Subscribe now to our newsletter.
Posted by android team
Jumat, 09 Oktober 2015
0 comments
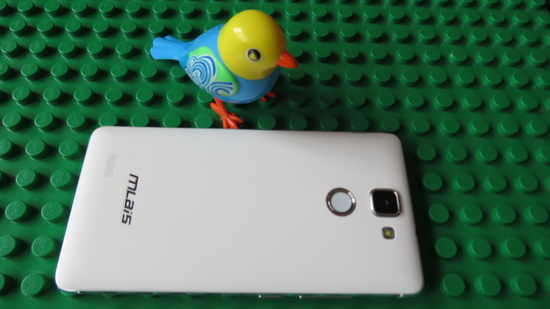
Yes, it's very easy indeed. When I first got the Mlais M7 Plus smartphone the firmware version was MLAIS_M7_PLUS_20150912, but the fingerprint sensor didn't work as it should. After the update to MLAIS_M7_PLUS_20150916 version, fingerprint sensor and related applications are working just fine now.
What do you need?
1. Download SP_Flash_Tool_exe_Windows_v5.1512.00.000 from here, here or here. (25 MB)
BTW, you can buy Mlais M7 Plus 4G Phablet from Gearbest.com for only $179.99 with free shipping.
What do you have to do?
Take a look at the below video and follow these steps:
1) Unzip SP tool and firmware 2) In SP tool folder, locate and run Flash tool.exe 3) On Flash Tool, under the 'Download' tab, Click on "Scattering Loading" and select the scatter file (txt) in the firmware folder 4) Once selected, the respective "Download Agent" and "Scattering Loading" files will be loaded onto the SP tool 5) On Flash Tool, click on the "Option" tab and look for a) "Connection and select High Speed Option b) "Download" and select "DA DL ALL with CheckSum" 6) In Flash Tool, under the Download tab, click on the drop down button and choose "Download Only" 7) Turn off your phone, take out the sim card, TF card and battery. Do not put back anything. 8) On Flash Tool, under the Download tab, click on the Green colour "Download" button 9) Connect your phone to the usb cable. 10) You will see a red progress bar at the bottom. Once done, a Green colour Circle will appear and YOU ARE DONE!
Enjoy, share is love!
Caution: Please do not update firmware unless you know what you are doing, you really want it or it is absolutely necessary. Firmware updates may occasionally have bad results, like bricking your device, temporarily or permanently. The firmware update process is done entirely at your own risk. Before attempting to update the firmware, back up your data.
Don’t miss any of our future video tutorials, follow us on Youtube. Like us on Facebook. Add us in your circles on Google+. Watch our photo albums on Flickr. Subscribe now to our newsletter.
Posted by android team
Minggu, 09 Agustus 2015
0 comments
This is an easy steps tutorial on how to install Windows 10 Pro latest build 10240 on Pipo X8 Mini PC:
1. First reserve you free copy of Windows 10 from Microsoft and wait for the download to be ready for you. Or you can just simply download the latest Windows 10 Pro x86 build - en_windows_10_pro_10240_x86_dvd - from here. If you have problems, you can use MediaCreationTool for Win10 provided by Microsoft.
2. Copy it on a micro SD card or USB flash, insert it into Pipo X8 Mini PC, mount the image and start install the Windows 10 setup. In my case, I choose a clean install. Finish the setup and finally reboot into Windows 10 Pro.
3. Download Windows 10 Drivers for Pipo X8 Mini PC from here, here or here. For the Pipo X8 Mini PC drivers, please use the provide Doubledriver software to restore them all at once, alternatively you can extract and install them one by one, but it’s more laborious. So just use the provided Double Driver application to simply restore the missing drivers from the collection, just locate the extracted folder. 4. To switch to Android just download and install Insyde_Q2S software. Download Insyde_Q2S from here, here or here.
About Gearbest GearBest is more than just a shopping site, it's designed for gadget lovers by gadget lovers. We have a passion for all kinds of tech from retro style to the absolute cutting edge. At GearBest, our company vision is simple: to become the premier online electronics seller by providing an unparalleled selection of the very best gadgets, an unbeatable shopping experience, prompt shipping and exceptional customer service that exceeds expectations. For us, the customer is always king. Our total commitment to customers empowers us to work closely together with every customer. When you buy from us, the sale is not complete when we ship your order, it is complete when you are totally satisfied.
Don’t miss any of our future video tutorials, follow us on Youtube. Like us on Facebook. Add us in your circles on Google+. Watch our photo albums on Flickr. Subscribe now to our newsletter.
Warning! If the firmware update, your installation and storage files will lost, so please backup your files before update! Download latest stock firmware update from here. (2015_07_07_P3S_Update_Firmware)
Flashing firmware guide
Step 1: Select the FAT32 mode and Format the TF card Step 2: Unzip the archive and copy the 5 files (1>P3S-ota-20150707.165124.V0823.zip, 2>aml_autoscript, 3>factory_update_param.aml, 4>recovery.img & 5>unlock_autoscript) to TF Card Step 3: Disconnect the power, insert the TF card into TV Box's TF card reader slot Step 4: Plug in the power, wait 20 seconds and the update will automatically start Step 5: When the TV screen display Erasing, remove the TF Card (This step is very important!) and continue to wait for five or ten minutes. If the box doesnt restart after 15 minutes, power off and power on again and it should boot the new firmware. Step 6: The update will be completed, enjoy!
Caution: Please do not update firmware unless you know what you are doing, you really want it or it is absolutely necessary. Firmware updates may occasionally have bad results, like bricking your device, temporarily or permanently. The firmware update process is done entirely at your own risk. Before attempting to update the firmware, back up your data.
Don’t miss any of our future video tutorials, follow us on Youtube. Like us on Facebook. Add us in your circles on Google+. Watch our photo albums on Flickr. Subscribe now to our newsletter. About Vigica
Shenzhen Vigica Technology Co., Ltd. is a professional multimedia video products manufacturer. Vigica will become a modern enterprise group.Our main products is Android TV Box, Android with DVB-S2/T2/ATSC/ISDB, Android Mini PC, fly mouse, ipush dongle, wireless category products.Red represents vitality, orange for creativity, blue for scientific and technological strength, meaning we exchange-good company is committed to developing excellence, efficient, capable people, limitless energy, adhering to the scientific concept of the infinite, and times, the courage to innovate understanding and use of new technology production and marketing of quality products, satisfy the stability of the customer purchased the product, price and service satisfaction of dominance
Posted by android team
Senin, 03 Agustus 2015
0 comments
Today I wanted to install some new applications from Windows Store on my new Chuwi Hi8 tablet with Windows 10 Pro on board, but I got all the time 0x803F7000 error. So I search the web and I found only one solution: to reset the Windows Store application by runnin 'wsreset' command. and maybe reboot after. Did that 2-3 times with no results.
Then I found myself the cause of this problem: the time of my Windows tablet wasn't synchronized with the internet time.
So to fix this problem simply go to 'Control Panel' --> Clock, Language, and Region --> Date and Time --> Internet Time --> Change settings --> Check 'Synchronize with an internet time server', choose a server and press 'Update now' button. Ok.
You don't need to reboot, once the time is synchronized. Enter Windows Store and restart the installations of your applications. Now everything works as it was supposed. That's it!
Don’t miss any of our future video tutorials, follow us on Youtube. Like us on Facebook. Add us in your circles on Google+. Watch our photo albums on Flickr. Subscribe now to our newsletter.
1. First Android Lollipop 5.1 stock firmware for MXIII-G TV Box from here.
2. Extract the archive and run setup_v2.0.5.9 file, it will install the Amlogic Drivers and the USB_Burning_Tool v2.5.0.9. It's working also on Windows 10 / 8.1 64 bit, but you'll have to disable driver signature enforcement. Then you have to put MXIII-G TV Box in upgrade / flash mode. To do that, prepare a thin metal stick / paper clip, then press and hold the restore button (inside the AV port hole) and press Power button at the same time. After 3-5 seconds USB_Burning_Tool will detect the USB device. (Very important: make sure to first plug in the DC and OTG USB cables). If needed, reinstall AMLogic USB Burning Tool and the drivers.
3. Launch USB_Burning_Tool. Click 'File' and choose 'Import image', choose the .img file you just download. Click "Start" to start firmware upgrade, it should take around 3-4 mins and please do NOT power off / unplug MXIII-G TV Box during firmware upgrade. After finished firmware upgrade, it will auto disconnected. Now you can unplug it and connect to TV again.
For more details please watch the video below.
Caution: Please do not update firmware unless you know what you are doing, you really want it or it is absolutely necessary. Firmware updates may occasionally have bad results, like bricking your device, temporarily or permanently. The firmware update process is done entirely at your own risk. Before attempting to update the firmware, back up your data.
Don’t miss any of our future video tutorials, follow us on Youtube. Like us on Facebook. Add us in your circles on Google+. Watch our photo albums on Flickr. Subscribe now to our newsletter.
About Gearbest GearBest is more than just a shopping site, it's designed for gadget lovers by gadget lovers. We have a passion for all kinds of tech from retro style to the absolute cutting edge. At GearBest, our company vision is simple: to become the premier online electronics seller by providing an unparalleled selection of the very best gadgets, an unbeatable shopping experience, prompt shipping and exceptional customer service that exceeds expectations. For us, the customer is always king. Our total commitment to customers empowers us to work closely together with every customer. When you buy from us, the sale is not complete when we ship your order, it is complete when you are totally satisfied.
Posted by android team
Minggu, 02 Agustus 2015
0 comments
This is an easy steps tutorial on how to install Windows 10 Pro latest build on Chuwi Hi8 tablet:
1. Download latest Windows 10 Pro x86 build - en_windows_10_pro_10240_x86_dvd - from here. If you have problems, you can use the provided MediaCreationTool - for Win10.
2. Copy it on a micro SD card or USB flash, insert it into Chuwi Hi8 tablet, mount the image and start install the Windows 10 setup. In my case, I choose a clean install. Finish the setup and finally reboot into Windows 10 Pro.
3. Download Windows Drivers for Chuwi Hi8 tablet from here or here. For the Chuwi Hi8 drivers, please use Doubledriver to restore them all at once, alternatively you can extract and install them one by one, but it’s more laborious. If you have problems with the calibration of the display, make sure to install 'chuwi-hi8_touch'. Reboot the system. [Update] You can also download the full backup of Windows 10 drivers - BayTrail 02.08.2015 13-33-46.rar - from here or here. Use the provided Double Driver application to simply restore the missing drivers from the collection, just locate the extracted folder. 4. To switch to Android just download and install Insyde_Q2S software. Download Insyde_Q2S from here, here or here.
Don’t miss any of our future video tutorials, follow us on Youtube. Like us on Facebook. Add us in your circles on Google+. Watch our photo albums on Flickr. Subscribe now to our newsletter.
About MakeTheOne Based at the heart of the ongoing hardware renaissance – Shenzhen, MakeTheOne is one of the very few gadget resellers who never fall behind trends nor fall short on supply. Inseparable symbiosis have been established between team MakeTheOne and manufacturers through years of global e-commerce joint exploration. Simply pick up a magazine, leaf through it, if you see something you like, we just might have it, or something that does exactly the same stuff, for much better price.
Don’t miss any of our future video tutorials, follow us on Youtube. Like us on Facebook. Add us in your circles on Google+. Watch our photo albums on Flickr. Subscribe now to our newsletter.
This is a very simple video tutorial on how to easily root Ulefone Be One or any MT6592 smartphone with Android KitKat 4.4.2 OS.
3 simple steps to follow
1. Download latest version iRoot v.1.8.5 tool from here or Kingo Android Root, then install it on your PC.
2. Enable 'USB Debugging' on your device. For that go to 'Settings' --> 'Developper Options' and enable (check) 'USB Debugging' option. To enable 'Developper Options' go to Settings > About phone > Build number, once you’ve found the Build number section of the settings, tap on the it 7 times.
3. Connect your smartphone to PC via USB cable; run iRoot or Kingo Root, wait for it to recognize your device and then press on 'Root' green button. Your phone will gain root acces. Reboot the phone. Go to Play Store and install SuperSu. Run it and uninstall chinese SuperUser. You can also uninstall the chinesse application (iroot daemon) installed on your smartphone.
Posted by android team
Jumat, 05 Juni 2015
0 comments
This is a simple tutorial on how to easily flash firmware on Tronfy MXIV TV Box with Amlogic S812 CPU via Windows 10 PC. BTW, you can now buy Tronfy MXIV Android TV Box for only $109.99 from www.tinydeal.com with free shipping.
1. First, download the latest 202k4 stock firmware for Tronfy MXIV TV Box from here. (MXIV_202K4_tronfy.img).
2. Download latest AMLogic USB Burning Tool v2.0.4.3. It's working also on Windows 8.1 64 bit (my PC OS), but you'll have to disable driver signature enforcement. Then you have to put Tronfy MXIV TV Box in upgrade / flash mode. To do that, prepare a thin metal stick / paper clip, then press and hold the restore button (inside the AV port hole) and press Power button at the same time. After 3-5 seconds USB_Burning_Tool will detect the USB device. (with the DC and OTG USB cable plugged in). If needed, reinstall AMLogic USB Burning Tool and the drivers.
3. Launch USB_Burning_Tool. Click 'File' and choose 'Import image', choose the .img file you just download. Click "Start" to start firmware upgrade, it should take around 3-4 mins and please do NOT power off / unplug Tronfy MXIV TV Box during firmware upgrade. After finished firmware upgrade, it will auto disconnected. Now you can unplug it and connect to TV again.
Tinydeal.com is a Hong Kong-based online shopping site who specialises in selling globally a wide range of inexpensive electronic goods and other related items. Some of the most popular gadgets available on Tinydeal include toys, cell phones and computer accessories, rechargeable batteries and chargers, and other novelty items. With over three thousand new products uploaded every month, Tinydeal.com is one-stop shopping site for all electronics lovers. Most importantly, while people form countries nearby China are enjoying the wide range China-made goods at relatively low price, we are dedicating ourselves to bring the same products to another side of the world at the similar price as you would paid if you were in China. Tinydeal is also a power seller on eBay for its large and varied product range, competitive product pricing, as well as its draw-card feature of free air mail shipping on all orders.
Posted by android team
Minggu, 31 Mei 2015
0 comments
This is a simple guide on how to easily reset the BIOS of Voyo Mini PC. I messed up some settings in BIOS the othe day, as I was trying to install also Android, and somehow I disabled the USB support in BIOS, so I had to reset BIOS to default settings.
If you want to do that, you have to download first 'Voyo Mini PC BIOS' archive from here, here or here. (2,44 MB) I advise everyone to make a copy of a working BIOS, if possible, before doing BIOS experiments. To do that you can simple use the provided afuwin-5.05.04 software. If you disabled USB in the BIOS, just like I did by mistake, only overwriting NVRAM can reset BIOS settings. In this way, there is no need to open the case, to teardown Voyo Mini PC, to reset the CMOS. All the actions are made from Windows environment, so your Mini PC has to be able to boot into Windows. All the following actions that are you will do next are entirely at your own risk.
1. Download the above archive. It is better to extract the content to the disk C.
2. Open as administrator Afuwingui.exe \afuwin\32\AfuWin32\Afuwingui.exe.
3. Open original backuped bios. Uncheck default 'Main BIOS Image' and check only NVRAM box. Press Flash. And best of all, start a command prompt as administrator and type, for example: C:\AfuWin32\afuwin.exe BIOS.rom /N
4. Press exit and restart the PC. After boot go into the BIOS and reset settings to default.
I tested myself and everything worked like a charm. Now my Voyo Mini PC BIOS is back to default settings.
All the credits for this are going to 2 Freaktab.com forum members:_NiK user for tutorial and to robertnik user for back-up BIOS file.